How to Clean a Dirty Oven?

Have you ever opened your oven, ready to whip up a delicious meal, only to be met with grimy, baked-on residue? If the thought of tackling a dirty oven feels overwhelming, fear not, for we’ve got you covered. In this article, we will guide you through the step-by-step process of deep-cleaning your oven, restoring it to its former pristine glory. With our expert tips and tricks, you’ll be enjoying a sparkling, fresh oven in no time.
So, if you’re ready to bid farewell to your dirty oven and hello to a fresh and inviting cooking space, let’s roll up our sleeves and get to work! By the end of this article, you’ll have all the knowledge and tools you need to breathe new life into your much-loved oven.
Identify the Type of Oven You Have
Before you begin cleaning your oven, it’s important to identify the type of oven you have. There are three main types: standard ovens, self-cleaning ovens, and continuous cleaning ovens.
Standard Oven
A standard oven is the most common type and does not have any self-cleaning features. Cleaning a standard oven requires manual effort and the use of cleaning solutions or homemade remedies.
Self-Cleaning Oven
If you have a self-cleaning oven, consider yourself lucky! These ovens have a built-in feature that uses high heat to burn off any residue or grease, making the cleaning process much easier. However, there are still some steps you need to take before and after the self-cleaning cycle.
Continuous Cleaning Oven
A continuous cleaning oven is designed to gradually burn off any spills or grease while you cook. These ovens require minimal cleaning effort, but occasional maintenance is still necessary to keep them in top shape.
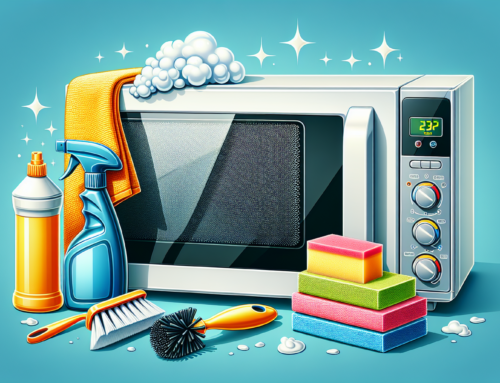
Gather Cleaning Supplies
Once you’ve identified the type of oven you have, it’s time to gather the necessary cleaning supplies. Here’s a list of items you’ll need:
Store-Bought Oven Cleaner
If you have a standard or continuous cleaning oven, you’ll need a store-bought oven cleaner. Choose one that is specifically formulated for oven cleaning, as these are designed to tackle tough grease and grime.
Homemade Cleaning Solution
If you prefer a more natural approach, you can make a homemade cleaning solution using items you probably already have in your pantry. A mixture of baking soda, water, and vinegar can work wonders on oven grime.
Protective Equipment
Cleaning an oven can be a messy and potentially hazardous task, so it’s important to protect yourself. Wear rubber gloves to shield your hands from harsh chemicals and use safety goggles to prevent any splashes from getting into your eyes.
Cleaning Tools
To effectively clean your oven, you’ll need a few cleaning tools. A scrub brush or non-abrasive sponge will help you remove stubborn stains, while a microfiber cloth can be used for wiping down surfaces.
Pre-Cleaning Preparations
Before starting the actual cleaning process, there are a few preparatory steps you should take to make the job easier and protect your kitchen.
Remove Oven Racks
To clean your oven thoroughly, you’ll need to remove the oven racks. These can be soaked separately and cleaned later. Removing the racks will also give you better access to the oven’s interior.
Lay Protective Covers On the Floor
Cleaning an oven can be a messy task, especially if you’re using a store-bought cleaner. Lay down protective covers, such as old towels or newspapers, on the kitchen floor to catch any drips or spills.
Ventilate Your Kitchen
Cleaning products can release strong odors, so it’s important to ventilate your kitchen while cleaning your oven. Open windows and turn on any exhaust fans to ensure proper airflow.
Applying the Cleaning Solution
Now that you’ve prepared your oven and gathered your supplies, it’s time to apply the cleaning solution.
Application Procedures for Store-Bought Cleaners
If you’re using a store-bought oven cleaner, carefully follow the instructions on the label. Generally, you’ll spray the cleaner onto the oven surfaces, making sure to cover all areas where grime has accumulated.
Making and Using Homemade Cleaning Solution
If you’re using a homemade cleaning solution, create a paste by mixing baking soda with a little water and vinegar. Apply this paste to the oven surfaces, focusing on areas with heavy buildup. Let it sit for at least 30 minutes to allow the solution to penetrate the grime.
Let the Cleaning Solution Sit
Once you’ve applied the cleaning solution, it’s important to let it sit for the recommended waiting time. This allows the solution to work its magic and loosen the grime, making it easier to remove.
Recommended Waiting Time
The waiting time will vary depending on the type of cleaner you’re using. Store-bought cleaners usually recommend letting the solution sit for around 10-15 minutes. Homemade solutions may require a longer waiting time, sometimes up to an hour.
Understanding the Importance of Allowing Solution to Penetrate Grime
Leaving the cleaning solution on for the recommended time is crucial to achieving the best results. The solution needs time to loosen the grime and break it down, making it easier to scrub away. Rushing this step may result in a more difficult and time-consuming cleaning process.
Scrub the Oven
Now that the cleaning solution has had time to work its magic, it’s time to scrub away the dirt and grime.
Proper Scrubbing Techniques to Avoid Damage
When scrubbing your oven, it’s important to use the correct techniques to avoid damaging the interior. For standard and continuous cleaning ovens, use a scrub brush or non-abrasive sponge to gently scrub away the grime.
Focusing on Problem Areas
Pay extra attention to areas with heavy buildup, such as the oven door or the bottom of the oven. Use a bit more elbow grease to remove stubborn stains, but remember to be gentle to avoid scratching the oven’s surfaces.
Clean Oven Racks
While your oven is undergoing its much-needed cleaning, take the opportunity to clean your oven racks as well.
Soaking the Oven Racks
Fill your sink or bathtub with warm water and add a generous amount of dish soap or a few tablespoons of baking soda. Place the oven racks in the water and let them soak for at least 30 minutes to loosen the grease and grime.
Scrubbing and Rinsing Oven Racks
After the soaking period, use a scrub brush or sponge to gently scrub away any remaining residue on the oven racks. Rinse them thoroughly with water to remove all traces of soap or baking soda.
Rinse and Wipe the Oven
Once you have finished scrubbing the oven and cleaning the racks, it’s time to rinse off the cleaning solution and wipe down the oven surfaces.
Correct Method for Rinsing the Oven
Use a damp cloth or sponge to rinse off the cleaning solution from the oven surfaces. Make sure to remove all residue, as leftover cleaner can cause discoloration or unpleasant odors when the oven is in use.
Ensuring All Cleaner Residue is Removed
Before moving on to the final step of reinserting the oven racks, it’s crucial to ensure that no cleaner residue remains on the oven’s surfaces. Take your time and be thorough in this step to guarantee a clean and odor-free oven.
Re-insert the Oven Racks
Now that your oven is clean and sparkling, it’s time to reinsert the oven racks.
Proper Re-insertion of Oven Racks
Carefully place the oven racks back into their designated slots, making sure they are properly aligned. Push them all the way back to ensure smooth sliding and prevent any issues with the oven door closing properly.
Checking for Smooth Sliding of Racks
Once the oven racks are back in place, test their sliding motion to make sure they move smoothly. If you encounter any difficulties or resistance, double-check their alignment and make any necessary adjustments.
Keeping the Oven Clean
Now that you’ve put in the effort to clean your oven, it’s important to maintain its cleanliness. Follow these tips to keep your oven in top shape:
Regular Cleaning Schedule
Create a regular cleaning schedule to prevent heavy buildup and make cleaning easier in the future. Aim to clean your oven every few months or as needed, depending on your cooking habits.
Spot Cleaning After Spills
Accidents happen, and spills are inevitable. To prevent baked-on stains, quickly address any spills or drips by wiping them up as soon as they occur.
Using Oven Liners
Consider using oven liners to catch any drips or spills and protect the oven from getting dirty. These liners can be easily removed and cleaned, saving you time and effort.
By following these steps, you’ll be able to keep your oven clean and functioning efficiently. Remember, a clean oven not only looks great but also ensures that your meals are cooked evenly and without any unpleasant odors. Happy cleaning!